If you recall the previous article on fixation of tissue, you will remember that the process of paraformaldehyde (PFA) fixation involves the cross-linking of proteins. This has the obvious advantage of preserving the ‘architecture’ of the tissue as covalent bonds are formed across the sample. However, the distinct disadvantage comes when immunohistochemistry (IHC) is carried out on such fixed tissue.
The process of cross-linking can ‘mask’ antigens of interest within your sample, in effect rendering some of the antigen binding sites invisible to your primary detection antibody. Fear not- this is where the techniques of ‘antigen unmasking’ or ‘retrieval’ come in.
Back in 1991, I was working for the Medical Research Council on a project examining contraceptive vaccines. In particular we were interested in the zona pellucida (ZP) proteins which are involved in sperm/egg recognition. I was regularly performing IHC on PFA fixed tissue- with mixed results. Some of the smaller ZP proteins were proving to be difficult to detect and image in our tissue sections. I still remember when the manager of the histology facility and one of the Principal Investigators gave me a copy of a paper by Shi et al. 1 which they were trying out in the histology lab. At the time, it seemed a rather strange thing to do- basically cooking slides in a microwave oven before IHC! However, the results were phenomenal. This method literally transformed our IHC results and we were able to detect and image all of the proteins we were interested in which had been previously masked by the PFA fixation. It became a routine part of our IHC method and we never looked back. So, what exactly happens when we pop slides in a microwave?
Obviously, things have moved on in the last 23 years! The technique has become more refined and researchers are using different methods to unmask antigens- still using microwave retrieval (but more commonly in specific lab-grade microwave ovens) as well as pressure cooking slides and enzymatic method to unmask sites of interest.
Mannich Reaction
There is still some speculation as to the exact way in which this method works. The original concept was that the heat and/or enzymes broke down the protein cross-links which were formed in PFA fixation. However, a paper from 20072 proposed that something called the ‘Mannich Reaction’ is involved in the cross-linking and unmasking. This reaction (very briefly) involves PFA reacting with an amine creating an intermediate ion which in turn reacts with the phenol group of tyrosine which creates the covalent bond and cross-link. The PFA-induced reaction of adjacent proteins can lead to a loss in immunoreactivity. The 2007 paper suggests that retrieval techniques simply remove such cross-link proteins which would otherwise interfere with antibody binding.
Before you go popping slides in the microwave, or subjecting them to enzymes, you should consider that some antibodies don’t need retrieval techniques for effective IHC results. If you are using a polyclonal primary antibody which recognises multiple antigenic sites, then you should be able to achieve good results without unmasking (albeit with more background). You should also consider which method of unmasking is suitable for your tissue/antibodies/end results. Some of the enzymatic proteins used may have a deleterious effect on tissue architecture and morphology and may even destroy the target antigen.
Proteolytic Induced Epitope Retrieval
The enzymatic unmasking is known as ‘Proteolytic Induced Epitope Retrieval’ (or ‘PIER’). The most common enzymes used are Trypsin, Proteinase K and Pepsin. When purchasing a primary antibody- read the data sheet which comes with it! This should state which enzyme works best with the antibody in question. If not, then Trypsin is generally recommended as effective with most antibodies/tissue types. As with all retrieval techniques, you should determine the optimal concentrations and incubation times using control tissue. There are two ways in which to treat slides with the enzyme- firstly, you can use a slide rack in a staining dish, but this obviously requires a larger volume of proteolytic enzyme. The second is to pipette the enzyme directly on to the tissue section on your slide. Whilst this uses much less enzyme, you should be aware that timing is critical in PIER, therefore don’t try to add enzyme to too many slides at once!
Most of the enzymes require a 10 to 20 minute incubation time at 370C in a humid chamber (if using the pipetting method) or in a water bath.
The materials/solutions for the Trypsin method are as follows;
– Stock Solution: 0.5% in dH2O. Dissolve 50 mg of Trypsin in 10 ml of water and store at -200C.
– Working Solution: 0.05% in calcium chloride solution.
– Calcium chloride: 1% stock solution. Dissolve 100 mg of calcium chloride in 10 ml of dH2O and store at 40C.
– Add 1 ml of the Trypsin stock and 1ml of calcium chloride stock to 8 ml of dH2O. Adjust to pH 7.8 with NaOH and store at 40C for one month.
If using the pipetting method, then warm the Working Solution to 370C before applying to the tissue sections. If using a water bath, then it is advisable to pre-warm the slides in a dish containing ultrapure water before transferring to a staining dish containing the pre-warmed Working Solution. Whichever of the two methods you use, the slides should be dewaxed and rehydrated as per the method in my H&E Part Two article.
Heat-Induced Epitope Retrieval (HIER)
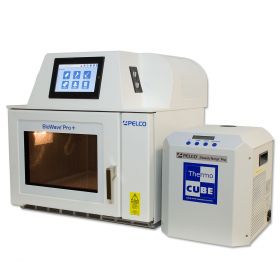
The method which uses a microwave or pressure cooker to unmask antigens is known as ‘Heat-Induced Epitope Retrieval’ (or ‘HIER’). It is widely regarded that HIER works by unfolding the protein cross-links formed during fixation, whilst the buffers used help to maintain the structure of the antigens and proteins. HIER is commonly performed in microwave ovens and pressure cookers. You should take into account that some older domestic microwaves may have ‘cold spots’ which are therefore unsuitable for this technique. Scientific microwave ovens are now available- have a look at the PELCO BioWave Pro tissue processing system which has been designed with more than 15 years microwave development experience to give consistently high quality results;
HIER is heat, time and pH sensitive. Therefore you should optimise the protocol to suit your tissue/antibodies. The most commonly used method in the last histology lab where I worked was the use of sodium citrate buffer in a pressure cooker. It’s the most popular buffer and is suitable for a wide range of IHC applications.
Sodium citrate buffer;
- Tri-sodium citrate (dihydrate): 2.94 g
- dH2O: 1 l
- Mix to dissolve. Adjust the pH to 6.0 with 1N HCl.
- Add 0.5 ml of Tween 20 and mix well. Store at room temperature for three months or at
4°C for longer storage.
Suggested HIER method (using a pressure cooker);
- Place pressure cooker on a hotplate in a fume hood and add enough buffer to cover the slides in a steel rack.
- Turn on the hot plate to maximum heat and dewax and rehydrate the slides as per the suggested method in my H&E article.
- Once the buffer is boiling, carefully place the slides in the cooker. Add the lid, and once the cooker has reached pressure, start your timer for three minutes.
- At the end of three minutes, turn off the hotplate and place the pressure cooker on the metal surface of the fume hood.
- Open the pressure release valve and let the cooker cool for 20 minutes.
- Transfer to a sink, open the lid carefully and run cold tap water into the cooker and the slides for at least five minutes. Proceed with IHC method.
1 http://jhc.sagepub.com/content/39/6/741.long
2 http://www.ncbi.nlm.nih.gov/pubmed/17471119
Author: Martin Wilson


