I’m going to start way back at the beginning of the whole microscopy and imaging process- at the fixation stage. Namely fixation and processing for light microscopy. Many of you reading this might think “hey, wait a minute, I’ve been doing microscopy for years, this all seems a bit basic!” Well, in one aspect you are correct, however, during my time managing and working in research laboratories, I have encountered numerous scientists who all have one great thing in common: taking it for granted!
Now, this isn’t borne out of ignorance or even a lack of desire to want to learn. It’s (mostly) purely a lack of time. How many of us have barely had the time to read the latest papers in our field of research whilst working at the bench? I know I struggled to keep up. So the last thing you will want to do is start questioning and reading all of the background and history behind a technique.
We’ve all taken for granted that when we place tissue samples in 4% paraformaldehyde (PFA) overnight that they will be fixed and ready for processing the next day. But, what exactly happens to the tissue when we leave the lab? How does PFA fix tissue compared to an organic solvent? By understanding these basics, we are equipping ourselves with solutions when troubleshooting our experiments.
To be aware of the cross-linking and denaturing of the proteins when fixing your samples will help you to understand what happens to your antigens of interest and the best method of antigen retrieval. In turn, this will help troubleshoot any problems when your staining doesn’t go as planned.
The basic premise of fixing is to ensure that the architecture of the tissue and cells remains intact throughout the whole process- from tissue collection through to imaging. It should also ensure that the proteins and antigens of interest are fully preserved when you come to add your antibodies and start the whole process of immunohistochemistry. However, fixation can be a bit of a two-edged sword. Over-fixation is a common problem and can render the proteins in tissue inaccessible to antibodies.
Organic solvents (such as methanol, acetone and ethanol) are generally faster and more penetrating at fixing tissue than cross-linking methods. Whilst this may seem attractive for thicker tissue specimens, the organic solvents are not the best choice if you want to examine sub-cellular components such as mitochondria or nuclei. The solvents remove lipids, dehydrate the tissue and precipitate the proteins out of solution. This leaves a protein ‘shell’ preserved within the architecture, but some smaller molecules may be lost during fixation. If you are interested in lipid-linked proteins, then best skip this method and go try cross-linking instead.
Methanol is a good choice if you are interested in the structure of cells and tissue, however, some antigen binding sites are completely destroyed by this method. If your tissue sample already contains fluorescently labelled proteins, then avoid this method as they will surely not be fluorescent after methanol fixation!
Whilst ethanol is a more penetrating fixative than methanol, it will disrupt cell-surface/membrane proteins and antigens. Pure ethanol is rarely used as a fixative as it causes the tissue to shrink and harden.
Acetone will fix in a manner similar to methanol, but is less ‘harsh’ when it comes to stripping binding sites. A methanol/acetone fixative solution is useful for preserving binding sites which may be otherwise destroyed by pure methanol fixation.
In general, the solvents are useful if you are interested in the overall architecture of tissue/cells and are good for examining the cytoskeleton. If you have a monoclonal antibody which binds to only one site of interest within internal protein structures, then this technique may prove to be an advantage over cross-linking. Organic solvents also permeabilise cells. Therefore, if you have an antigen of interest buried within a cell, then the solvents should allow access for your antibody.
When cells and tissues are fixed by cross-linking, covalent bonds are formed between proteins and the surrounding structure. This method essentially ‘glues’ everything in place! The PFA reacts with the primary amines on the proteins and forms the cross-links known as ‘methylene bridges’. These bridges provide rigidity and preservation of the cells and tissue. Cross-linking methods are best for preserving the cell structure, but the actual process of fixation may render some binding sites ‘invisible’. This is where antigen retrieval techniques (and/or permeabilisation) can be used to ‘unmask’ epitopes which would otherwise be hidden in the cross-linking process.
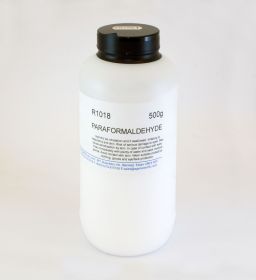
Paraformaldehyde (PFA) is the main fixative of choice for cross-linking of tissue (http://www.agarscientific.com/paraformaldehyde-500g.html). Briefly, the paraformaldehyde is dissolved in water with NaOH at 60oC and diluted to 4 % ready for use. PFA rapidly penetrates tissue, but can be slow to cross-link proteins. Consequently, one of the main problems with PFA is under-fixation of tissue. You’ll read and hear about PFA incubation times of between 10 minutes and many days. It all depends on your cells/tissue and the antigens which you are trying to examine.
If you do not have a standard protocol in place for your tissue of interest, then try to collect some control tissue which you can use to optimise the method and the time of fixation which will give you the results you require. After dissection (you can check out the Agar Scientific range of dissection instruments here: http://www.agarscientific.com/lm/dissection.html) you should aim to keep your samples cold and transfer them to a fixative as soon as possible. Tissue without a blood supply will start to degenerate pretty quickly! Furthermore, when cells are disrupted they will release enzymes which will cause autolysis (self-digestion of the tissue).
In the next article, we’ll take a look at what happens during the stages of tissue processing before embedding in wax.
Author: Martin Wilson


